T.O.G.R.A.F. Recipes for cooking talismans, absolutes, amulets
"Photographer" is a global modification of the game S.T.A.L.K.E.R. with a completely new plot. You, in the role of a war correspondent and intelligence officer with the call sign "Photographer", must get to the very heart of the Zone and find a mysterious source of colossal energy. At the same time, it is necessary to investigate and describe the phenomena occurring in the Zone.
"Stalker: Photographer" will delight us with a completely new plot
The creators of the mod, who had previously developed the modification for Stalker "Secret Paths 2", did a solid job: new locations were added, the sound component of the game was reworked, the graphics were improved, an original plot was developed with several parallel quest lines. In addition to completing the main quests, you need to look for minerals, talismans and amulets, study their properties, and invent recipes to obtain new useful items.
This article discusses in detail the walkthrough of the S.T.A.L.K.E.R. mod. "Photographer": completing quests, searching for caches, objects and artifacts, additional tasks.
Please note that the passage of "Stalker: Photographer" is designed for leisurely and thoughtful gameplay. Due to the player's simple inattention, many interesting plot twists may be missed.
Location "Peacekeeping Corps" in the walkthrough Stalker Photographer
After loading and starting the game, go to the colonel and talk to him. After taking the items from the box, you will learn about the loss of the camera. Follow the colonel again and chat with the character. He will say that you need to talk to a stalker nicknamed Shaved. He will have to be escorted to the fallen helicopter. Go to the crash site and inspect it carefully. Examine the marauder's corpse and find the notebook. But again there is no camera.
Talk to Shaved and go to Sidorovich, who in turn will redirect the hero to the foreman. The foreman is located inside one of the buildings standing directly opposite Sidorovich's bunker.
After talking with him, run to the marauders’ camp along with four other fighters. After clearing, you will have to give the missing PDA to the NPC. Move in a squad and go down the slope to find the entrance to the cave in the hole. After killing the bandits, search everyone and find the PDA. Return to the foreman and give him the item he needs. He will tell you where the things you need may be.
Go back, go to the stuffed dog near the fire and pick up the items. If you did it before, then continue as written below. Follow Brown and report the success of the mission. You will have to visit Sidorovich again, who will tell you about the guide who constantly lives in the bandits’ bar. According to him, he will be able to help you solve the problem.
Follow to the basement next to Sidorovich's bunker and find the drone. Talk to him. The character will ask you to get a leather cloak for him. Return back to the bandit settlement and find the cloak. It can be in one of several places - it is selected randomly. But in all cases, the cloak lies in the attic inside one of the buildings. Be sure to visit the Pied Piper who lives in the basement to get the “magic pipe”. You'll need it soon. Don't refuse and bring him dead bats.
Follow to the bar and try to get inside - you need a pass. At the entrance you can meet a tall guy who will tell you how to get a pass. Go to the store and talk to the seller. In exchange for a pass, he demands 10 antirads from you. The Fallout series immediately comes to mind... To find them, you will have to visit the peacekeepers' base and chat with the ensign sitting in the hangar. Again, it’s not just like that: you’ll have to give him products that you can exchange with stalkers. The pass to the base will be useful in the future. Having obtained antirads, he will exchange them for a flyer with Boris.
Return to the bar and show the flyer to get inside. Try to chat with the characters. Exchange bottles of vodka for photographs of naked girls from one of the bandits, whose gaze is directed towards the bartender. Approach Gilet at the bar and have a glass with him. From him you will learn about a guide named Zhorik. He has a bad hangover now and won't turn down a bottle of beer. Buy this drink at the bar and go in search of Zhora.
And Zhorik is currently resting inside a booth on a hillock located on the left side of the store. Having found it, pass the beer. He will agree to find a secret passage through which the mercenaries and the informant can go. Follow Zhorik, do what he says - you don’t need to approach too far, but at the same time you should stay in sight - use binoculars for this.
Wait until you receive a message about the destruction of the informant. Kill all enemies. There may be a bug here when, when the second mercenary is destroyed, the quest goes into the “Failed” phase. In this case, the guy needs to be left alive and finished off later. Zhorik will already be killed by this time. Search all the bodies and take the required PDA from the informant's corpse. You can safely sell Karan.
Go back to Drone and give him the leather cloak. From him you will learn that a foreigner was looking for you. The quest is optional. Sidorovich, by the way, will have offers for new work, which does not affect the storyline one bit. Decide for yourself whether to complete the tasks or not. Follow Brown and report on the completion of the mission. Give him the PDA taken from the informant. Brown will tell you that you need to wait a bit. Do so. As a result, a new message should appear. Go to Brown and talk to him. You will have to visit the testing site. In addition, a transition point will appear on the map, which makes the task much easier.
Location "Test Site" in the walkthrough Stalker Photographer
When you go to the location, you see another message. You must talk to Voronin. Go to the indicated markers on the map and take pictures of the necessary objects. All these photos must be taken during the day!!!
Visit Voronin and talk to the character. From him you will learn how to get into the Ukrainian base on the territory of the test site. In the next room you can talk with Sakharov. Watch the experience using crystals and take the quest from him. We need to find a PDA belonging to Lavrov in the swamp. Return to the Peacekeeping Corps location and enter the base. Find here the Cook, who is the brother of the head of the base from the previous location (Test Site). It is located behind the hangar.
If you don’t find it, then go to the boss’s booth and talk to everyone. After this, the Cook will appear in the location indicated above. After talking with him, pick up the package and return to the testing site. When you go to the location, you will see a message according to which you need to provide assistance in the battle with wild boars in the territory of the digger village. Be sure to help them! If everything works out, you will be able to communicate with Edik - a corresponding message should appear! You will meet him later.
Go to the Ukrainian base, since you now have the pass you received from the Cook. Go to the second floor and talk to Polishchuk. The dialogue must be studied very carefully! You will learn about a deserter who is best found before the military does. To be on time, you must leave immediately!!! The required character is located on the territory of the ATP ruins - in front of the digger village. After talking with him, make an offer.
Run to Edik in the village and talk to him to conclude an agreement related to the deserter. In return you will need to give 3 army first aid kits. You can buy them from Petrenko at the peacekeepers’ base or exchange them with someone. Take the first aid kits to Edik and find the deserter again. Take him to the village and pick up the required document.
Run to Vasiliev, located in the swamp. You need to find Lavrov, who disappeared without a trace. The character will say that it is best to talk to the doctor in the swamps, who knew Lavrov well.
Kruglov is also located here, in a conversation with whom you will learn that he wants to investigate the anomalies. This is an additional quest! If you take it, you will have to find 7 anomalies at once - electa, funnel, frying, snowball, springboard, jelly and carousel. For completing the quest you will receive an anomaly detector. But not immediately - it will be produced in a day. Go to the doctor's house, which is located next to the damaged bridge, and talk about everything. Study the dialogue and find Lavrov's body.
Return to the doctor again to pick up the message to Sakharov. Pass this message and the PDA found on Lavrov’s body to Sakharov. Now you can take on a new quest related to the transformation of crystals. Return to Brown at the peacekeeping corps and report the completion of the mission.
Brown will tell you that you can rest. Later, General Smith will call you - you will receive a message from him. Go and talk to the character to find out about the failed photographs. You will have to improve your camera. A new task will appear - you need to eliminate two enemy groups. To do this, you should visit the Industrial Zone - that same landfill. You also need to get into the territory of the anomalous forest, to which there is no passage yet.
Smith will invite you to visit Voronin, with whom you need to talk about the transition to these two locations. You also need to meet with Drozdov, who should help with improving the camera. Both characters are in the same building. Visit the base on the territory of the test site and find Drozdov there. Ask him to improve his camera. Drozdov will say that he is beyond his strength, so he needs to visit Lefty in the bar. The transition to the base territory is located on the territory of the Industrial Zone.
 General Smith
 Follow Voronin, but he will say that he knows nothing about the transition. But you will still receive a hint - you need to find a hermit named Charon. Go to him, but be careful. If you don’t find it right away, Charon will leave and you won’t see him again in the game. This will lead to the failure of the plot, and from now on you won’t be able to see the transition of the Industrial Zone. Follow the fence located behind the Digger village to find a passage into it.
Find Charon behind this fence and talk about everything. He will say that he is ready to show you the passage, but you will have to take the parcel to Lukash, who lives in the Industrial Zone. Lukash, in turn, will show you the place where you can go to the territory of the anomalous forest. Agree and receive a transition point to the Industrial Zone. Report everything to Brown, and then pick up your pass to the checkpoint. Show your pass to move on.
Industrial zone and Anomalous forest in the walkthrough Stalker Photographer
Go in search of Lukash, who is inside the carriage in front of the hangar. He will agree to show you where the transition point is, but only if you complete his task. You need to take the PDA to the hangar, where the diggers are waiting for you. Take it, but be prepared for a surprise. Report what happened to Lukash and take him to the hangar. Until the territory is cleared, Lukash will not talk to anyone. Stay below and wait until the deserters kill the enemies. You will need to receive a message, after which you can safely visit Lukash. Talk to him, after which he will mark on your map the transition point to the territory of the anomalous forest. This will be a red marker.
Follow this location. When leaving the hangar area, you will need to kill the paratroopers. Having arrived at the indicated point, you will find that the passage is blocked. We need to wait for the mercenaries to arrive. Hide so you don't get noticed. From the conversation of the mercenaries you will learn when the passage will become open. After killing everyone, take the PDA, go to the anomalous forest and study the map. There will be another point on the map - go to it and receive a message.
Hide so that other mercenaries do not notice you, and wait. When the enemies stand opposite the passage and start a conversation, kill them all and search the bodies. Take another PDA. From the forest you can go to the testing site where Voronin is located. Take a look at the map and you will see another red dot on the border - go to it, go to the training ground and visit the base where the courier is located. Give him two found PDAs at once and go to Voronin to tell him about the two transitions. The man will say that Petrenko asked you to appear at his place. Find it in a room nearby and receive a task - you must find black boxes from 10 fallen helicopters for it. This quest must be taken. Visit the bar to upgrade your camera. Follow the passage to the bar.
After receiving a message from Lefty (you won’t have to immediately), take the camera and return to General Smith to report on the mission. Smith will take you to different locations to take pictures. A message from contact Brown will appear. Go to the forester's house and talk to the owner. A little later, a messenger will appear who will tell you about Brown’s request - you need to visit the dead city and provide assistance to German scientists. The guide, who is part of Sutuly’s group, knows the way to the right place. It is located next to the quarry. Complete the task, then talk to Sutuly again and find out that the guide is in Lefty's bar.
 Important objects on the territory of the Dead City
 Return back to the bar and chat with Lefty. He will tell you that you need to talk to the diggers inside the bar. A little further from Lefty you can find Brom sitting at a table. Talk to the character and find out that the nickname of the guide you need is Owl. It is located inside the annex where you met Petrenko in the original game.
The owl wants you to bring two bottles of wine for him. The wine is located in the swamp. You need to talk to scientists who will tell you about the crashed helicopter with food. Find the boxes near the helicopter and take out the wine. By taking it to Owl, you will learn where to look for the passage to the Dead City. Before you go there, be sure to talk to Brom. After that, go to the Dead City.
Location "Dead City" in the walkthrough Stalker Photographer
On the territory of this location, find Zubarev, who is located in a building not far from the outskirts. A clone of this character can be found in a five-story building - it's a trap, so it's better not to go there. After talking with the real Zubarev, be prepared that he will be killed. This is how the story should happen! Continue along the road and turn back to walk along the fence. Find a passage in it and follow to the bridge. Go through it and turn right to follow the top of the cliff. The tent will be visible from afar. After searching the corpse, take the artifact Brom needs.
 Sergeant Zubarev
 Save the data that is in the black box inside the helicopter. Follow the platform and inside the building on the right side of the monument you will find Heinrich, the head of German scientists. He will send you to Jagger, located in the building opposite. In turn, this character will say that you should visit Gertrude. The woman will ask you to find a scientist named Wulf, who has the documents. Take the papers from Wulf and return to the woman. Having taken the necessary device, go to search for the transition point to the anomalous forest.
The transition will appear immediately when you are near the correct location. Agree with the group to leave the Dead City, and kill zombies along the way. When the last character leaves the area, the task will be accepted - you helped the scientists. By the way, one of them may get stuck in the doorway. Be careful! You will not be able to approach the transition itself - your character will be thrown aside.
Remember the note from Wolf? Go find the physicist, who is located inside the five-story task. The entrance inside can be found from the neighboring entrance - follow the wires. Find Medvedko and talk to him. Agree with the proposal that you need to find the purple ball. Follow the fence to the lower part of the location and on one of the hillocks you will see a lonely house. Near the entrance you can find a purple ball - that's what you need! After talking with Medvedko's wife, go in search of the ball.
Go through the hole and go through the lower left part of the location - follow along the location. After taking the ball, make sure you have it in your backpack. Follow back and pass the ball to Medvedko. Talk to his wife and leave the city area. In the anomalous forest, find a receiver among the boulders and move to the bar - not far from the point through which you came.
Find Owl in the bar area and give him the receiver. Give the liquidator (artifact) to Brom. He will tell you where you can find another such artifact. Find a contact and receive a task to infiltrate the X-18 laboratory. Inside it you are asked to find a communication diagram. But first you need to understand how to get into the laboratory. Visit the testing site, go to the base and talk to the archive keeper. He will say that the bartender may know the transition point. Follow to the bar and tell the owner everything. When you leave the bar, you should be stopped by Poetry. To be more precise, you will hear the word “here”.
Go to the direction from which the sound is heard. You will be stunned. You will see the Poemweaver. After the dialogue with him, go search for the teleport. If you read everything carefully, you will find the teleport without any problems. Having done this, complete other tasks. Everything you need to find is located in hiding places. Find the first teleporter, located next to the passage to the landfill. You will need to move along the cliff.
Finding teleports and returning to the training ground
You will teleport every time. In this case, after all the movements, look for backpacks, inside of which are the following teleporters. It is imperative to pick them up, since this is not just a hint, but also an important stage in activating the teleport. Only after you take the clue from the backpack will the next portal be activated. Eventually you will be transported to the Dead City.
Here, go to the northern part and find a refrigerator near the swamp. In the X10 laboratory, find both the teleporter and the door code. In the forest area next to the excavator, jump near the caterpillar on the right side of the transport, when viewed from the side of the bucket. The teleport does not appear immediately! There is no need to panic inside the cave - go forward to the anomalies on the mini-map. Escort the beautiful Greta and take the artifact. Talk to the girl who will give you a letter addressed to the head of the archive at the training ground.
Run to Petrenko and give data from ten fallen helicopters. Go to the base and give the chief of the archive the note you received from Greta. After talking with the papor on the top tier, give the item from the cave. When you go outside, you will hear the sound of a siren - it notifies you of an attack on the base. Help in the battle against the soldiers, but do not rush to use grenades, as you can hurt your allies, who will immediately become enemies. After defending the base, go to Poleshchuk and try to find out what happened. But he is killed.
Meet with Brown, who will tell you that you need to visit the X18 laboratory. Follow the right place and find the Ghost inside the tunnel. He will ask you for a barrel and ammo. Hand him the weapon, having first loaded it all the way, and then throw a pack of cartridges for him. Inside the laboratory, find Professor Ploymer and talk to him. So he will agree to cooperate with the hero. Escort the professor upstairs and report the success of the mission to Brown.
In accordance with the next quest, you need to find a laptop that contains data inside. There, in the dungeons of Agroprom, you will have to find an antiviral drug. The path to the Agroprom dungeon can be found out from Major Shpak, who is part of the guards of scientists in the swamps. Go there, find the drunk Major located at the top. After talking with him, you can agree or refuse the request. In any case, he will ask you to bring a box of vodka, and later he will give you another task. To find out about the transition point to the location, you will have to find three bottles of beer. Agree and bring it to get into the Agroprom dungeon.
Location "Agroindustrial Dungeon" in the walkthrough Stalker Photographer
Having gone down to the right place, kill the zombies, moving to the upper level. You will be transported to Strelok's hiding place, where you will meet Verseweaver, who will take the ammunition. There is no need to remove it in advance and hide it somewhere!!! After a while, the Phantom you saw in the base tunnel will appear. Ask for help. He will return the barrel to you. Leave the prison and go upstairs. Kill enemies and traitors of scientists. By the way, there will be two scientists - brothers. Search everyone and take the vaccine from the scientist's pocket. There is no need to take the vaccine, since there is only one.
Find your things in the box nearby and report to Brown what happened. He will send you on reconnaissance - you need to study the transitions between laboratories. Having found the decoder from the door in the X18 laboratory, you will find yourself in the part of it where you talked with Ploymer. The decoder is on the scientist's corpse in the laboratory. Go into the tunnel of the Ukrainian base and go to Brown to report what happened. The character will ask you to find the transition to the location of the collective farm “Chervone Drawbar”. To do this, talk to Voronin, who will send you to Sakharov. He will ask you to move the car left in the forest. It is necessary to visit the hunters in the forest. This is the same Slouchy!
Go there, find the character and ask for help. He will agree, but he needs money. Previously, you could have found a wad of dollars or euros on the corpse of the Poemweaver. Give him the money to get a guide dog. Run after her and kill the enemies. Along the way, you will encounter mercenaries who will finish off the dog. Kill them and search the bodies to find the PDA and the transition point to the Chervone Drawbar location.
Location "Collective farm Chervone drawbar" in the walkthrough Stalker Photographer
Once in the right place, you will receive a message from Sakharov - move to the territory of the cemetery, killing several enemies, and deal with the bandits in the territory of the located village. Behind the village there will be a hanging island. Approach him and receive a message from Sakharov. From it you will learn about a new mission to rescue the scientist.
The wounded Ormont is located next to the helicopter - after curing him, escort him to the island and find out that there is an anomalous zone located directly below him. You will have to turn it off while simultaneously covering your comrade. Be careful: save before the scientist appears in the anomalous zone. There will be snipers here who will have to be killed before they eliminate the scientist. Enemies appear one at a time.
After this, go to the anomaly under the island, find Ioffe’s corpse and take the flash drive, which should be given to Ormont. Talk to him and get passage back to the anomalous forest. Follow there and find Voronin's car, which is located on the road leading to the Forester's house. Drive the car to the training ground, to the base gate, and then report the success of the operation to Voronin. Return to Brown and report completion of the quest.
The character will say that he entered into an agreement with Voronin related to the cleansing of the collective farm. But first, you must coordinate future actions with Voronin himself. He will give you a task, according to which you should help Plichko. Plichko must seize a factory on the territory of the collective farm. Move to the place and meet with Plichko. Chat with him and follow to release. Don't run forward, otherwise the quest will fail. Help in shooting the mercenaries.
At the same time, protect Ozerov. Wait for Plichko to approach you. If this does not happen, then go in his direction and escort him to the right place. Sometimes a character may refuse to talk if there are still mercenaries or “Duty” fighters in the location, even wounded ones. After talking with Plichko, wait out the ejection and talk to him again. We need to find the escaped leader who has a PDA with the necessary data. Go to the village, find the leader and take away his PDA.
Wait for Voronin to appear and find him inside one of the buildings. Petrenko will also be there. Green markers will appear on the map - these are the necessary characters. Hand over the PDA taken from the leader, and then find out what really happened to the collective farm. Brown and his team most likely died in the dungeon. You will receive a message inviting you to the territory of “Duty”. Refuse and go find Brown. If you're bored, you can, of course, join Debt. Brown is located in the X10 laboratory. Members of his team died. Here you will meet Shubin - he can save Brown, but only if the main character helps him find a human form. To do this, you need to find four pentagrams, which also need to be activated (you will have to throw the right objects at the pentagrams).
Search for pentagrams in the walkthrough Stalker Photographer
You will need parts of some mutants and a red talisman. Go to the tunnel with elects on the territory of the Agroprom dungeon, where you need to throw a cat's tail, a kink arm and a red talisman. Next, you will find out the place you need to visit next. Continue and after everyone is activated, visit Shubin. Hand over the bat carcass and the crow carcass. He will give you a medicine that will restore Brown. Escort Brown to the base and talk to him. He will say that Shubin is in a cave hidden behind the stones of an anomalous forest.
Move into the forest and talk to Shubin in the cave. You need to free 11 dead souls. Three are in the peacekeeping building, one in the swamps, one in the forest, three in the Industrial Zone and three in the bar.
On the territory of the Industrial Zone, look for souls near the tunnel, the transition to the bar and next to the transition to the peacekeeping building. Near the bar, look next to three crosses, behind the containers immediately at the entrance of the location, if you move from the Industrial Zone, and also near the transition point to the Dead City.
Go to Shubin inside the cave and tell him about completing the task. As a reward, you will learn where the passage to the secret cave is located. More precisely, you will find out that a nuclear power plant engineer named Pasha knows how to get into the cave. Pashka usually hides in the basement of destroyed houses on the territory of Pripyat. Shubin will tell you about hiding places. Listen carefully to what he says. A message will appear from Smith, who will report the information found regarding the crossing point to Pripyat.
You need to find Razuvaev in the village and take the PDA from him. Go there. The bandits are located above the bar. Take the PDA and see on the map the crossing point to Pripyat.
Location "Pripyat" in the walkthrough Stalker Photographer
When you make the transition, you will have to take with you one can of condensed milk, which will be useful in a conversation with Pashka. You will find the remaining items in caches on the territory of Pripyat. Once there, first find the cache - it will allow you to find out the codes to the doors of the secret cave. It can be located in the northern part of the stadium stands, between the benches on the left side. It could be in its eastern part, on the ground near the fence, or in the grocery store at the bus station, in the corner where the mailboxes are located. The last potential location is next to the entrance to the basement of that same grocery store. Having found the cache, take the PDA with the code and a can of condensed milk.
Go in search of Pashka. Having found it inside the basement in the club, pass the condensed milk and find out about the passage to the secret cave. Go inside it.
Location "Sarcophagus" in the walkthrough Stalker Photographer
You'll have to kill a lot of enemies, so stock up on ammo. When you are near the Monolith, the main character will be stunned. When you come to your senses, you will see Smith. Talk to him and find out interesting things. Near him you will see Shubin, who has moved into Brown's body. He will save the hero. During the conversation, the hero will be shot - you will find yourself in a mysterious place. There will be a blue tree in front of you, you will find out the name of the photographer, and you will also see the ending of the game. The choice is yours!
General information about Psi-zones and crystals
A new system of substance transformations has been implemented. Anomalies in the modification have not yet developed as powerful and dangerous creations of the Zone. There are no artifacts known from the original PM yet. There are (according to our version) only the beginnings of anomalous substances called “crystals”. During the course of the story, the player will have to search and study the properties and abilities of various types of crystals to transform in special anomalous psi zones, which have their own distinctive visual and sound characteristics that manifest the zone if the player has an activating crystal corresponding to this psi zone. The crystals will be divided into activator crystals (different psi zones will react differently to different types of activator-catalysts: a specific sound, a specific visual effect and the effect on the actor) and reagent crystals participating in the catalysis process. The output is absolute minerals with unusual and diverse properties. In the psi zones of the second level, the process of transforming absolute minerals into unusual minerals-Talismans with their own unique properties is possible (the process of the second level involves two different absolute minerals, one of which is an activator. Which one is not known). And finally, the third level of catalysis is the transformation of Talismans into Amulets, which have powerful protective properties) through a biological catalyst substance (mutant spare parts). Accordingly, the latest psi zones will also have their own distinctive visual and sound characteristics, which will appear if the player has an activating element corresponding to the given psi zone. But, unlike the first two, to activate these unique zones you will also need a special device, which the player will also have to obtain.
Recipes
Transformation of absolutes in Psi-Zone No. 1

Transformation of absolutes in Psi-Zone No. 2


Transformation of absolutes in Psi-Zone No. 3


Transformation of absolutes in Psi-Zone No. 4


Transformation of amulets in Psi-Zone No. 1


Transformation of amulets in Psi-Zone No. 2

S.T.A.L.K.E.R. - PHOTOGRAPHER. a stranger among his own
©

Another masterpiece from modders
It’s simply amazing that a game that’s already nine years old is still captivating, and you constantly find new ideas, gameplay opportunities and original solutions in it, of course we’re not talking about the original game (since it’s been played through and through so many times), but about numerous modifications for this series of games.


It’s very sad that since the last part of S.T.A.L.K.E.R. no one makes shooters of this level.
I advise you to immediately install a fix on the boxes (I downloaded the mod from a torrent, not from the official website) and although the latest patch was added there), the game still crashed when wooden boxes were broken.
And be sure to fix the mute crows, since their cawing got to me after just an hour of playing.
It just so happened that this mod somehow passed me by and I tried it only now, I’m just surprised how I didn’t notice it before.
I didn’t choose this name for the blog by chance, there are two reasons, let’s start with the fact that GG is not really who he claims to be, but the most important reason is that this mod differs from most others in its gameplay.
I’ll say right away that fans of action and a lot of shooting are unlikely to like this mod, since there are several times less shootings here than even in the original, not to mention other modifications in which there is much more action.
Basically, here you only have to kill mutants, and there are very few NPCs as enemies here, this is the concept of the mod, even the military and bandits are not your enemies, with rare exceptions.
The mod has a completely new plot, new quests, new locations, characters, although some characters are also in the original TC, this is almost a new game with all its components.
As you can understand from the title, we will play as a photographer, a correspondent (such is the legend of the GG) and the camera will be an integral part of the gameplay, you will need to photograph various objects, people, at some point you will have to upgrade the camera so that pictures can be taken in the zone with its abnormal activity were obtained without distortion.
You can only take photographs during the day, at night you won’t be able to do anything, and naturally you will do this for a reason, but you will receive a reward for it and, no less important, you can also earn money from this by taking on a certain quest.
It is quite difficult to make money in this mod, especially at the beginning, when compared with other mods.
Exoskeletons and Vintorez are not lying around on the road, they can only be obtained as a quest reward, just like many other guns and armor.
As I already wrote above, you will have to shoot at NPCs very rarely here, quests are built on the fact that the GG will solve any problem peacefully, negotiate, act secretly, and often you will need to quietly follow the NPC.
Here you will have to read every dialogue very carefully, listen to what the NPCs say, and constantly watch the PDA, since often what exactly needs to be done in a particular quest in the PDA is indicated in general terms and very often the quest marker is simply missing, and sometimes the quest it doesn’t weigh in the PDA, you get all the information and tasks from the dialogues, and quite often you will have to rack your brains about what to do next to advance the quest.
It's no secret that one of the key special games in this series is the search and collection of artifacts, so in this mod there are no artifacts in the usual sense, a very interesting gameplay feature was invented, it was done in a very original way and can take a very large part of the time if you lean on it, but To do this you will have to figure it all out, it’s done in a rather confusing way.
No one specifically forces you to do this, with the exception of a couple of quests in the plot where you still have to find a couple of crystals (that’s what the first stage of artifacts is called here), i.e. you can complete the game without this, but it will be more difficult, especially if you play on a master, because artifacts add protection from various anomalies, radiation, needs and damage, make the game easier, and then you will miss a very interesting part of the gameplay.
I wanted to write this paragraph as briefly as possible, but it doesn’t work.
If we briefly describe the entire gameplay associated with artifacts, then you will have to make artifacts yourself from several parts of crystals, and in the future, when cooking the most powerful type, you will also need to use certain parts of monsters (very important, you can do this only after completing a certain stage of the plot and the first emission will pass, the most powerful artifacts are called amulets, you will also be able to cook only after completing a certain quest and receiving a special detector of psi-zones of the highest order). Crystals spawn in any location in certain places, usually these are ravines and lowlands.
The essence of cooking crystals is that each crystal has a double and it differs only in color, but has the same shape. Having found a suitable pair of crystals, you will need to find a psi zone of a certain type in the location (they are in every location) when you get into such a zone on the screen a corresponding inscription will appear (you can’t stay in this zone for a very long time, otherwise the GG will simply die) and if you have crystals of the appropriate type, then when you get into the desired psi zone there will also be various visual and sound effects, you need to throw away the same pair of crystals and they will be cooked into a more advanced form - absolutely, before cooking the crystals it is better to save as this process does not always go smoothly, there is a chance that the crystals will not be cooked and you will only have one left.
The crystals that you find do not have any properties, when you weld two crystals it will turn into an absolute, the next stage of artifacts, but it will have many negative effects and few positive ones, so you are unlikely to wear it. When you have paired absolutes, you You can also cook them, as a result you will get a talisman, it has fewer negative properties and more positive ones. And the last stage of cooking artifacts is from the talisman, you can cook a talisman, as I wrote above, in order to cook a talisman you need to go through a certain quest from Sakharov (this scientist who is located at the testing ground location) and get a special psi zone detector, hang it on your belt, without it you won’t be able to weld amulets, you will also need a certain part of the monsters.
When you brew the first absolute in the PDA, a recipe and description of this absolute will appear, as well as a hint in which psi zone it should be brewed, moreover, marks of the psi zone in which you welded a crystal remain on the map.
When you have welded a crystal, the psi zone needs time to recharge (that is, you cannot weld several pieces at once), the higher the level of the psi zone, the longer it takes to recharge, the first level is one hour and the last one is where you brew amulets are three hours.
As I already wrote above, apart from a couple of quests, you won’t have to do all of this, but firstly, it’s quite interesting and secondly, it will make it easier for you to complete the game; it’s felt quite well on the master.
Another key feature associated with crystals is that as they are collected and cooked in psi zones, the GG will have hallucinations, and the more you wear these crystals, absolutes, amulets in your inventory and on your belt, the stronger the hallucinations will become.
At first it will just be different sound effects, then various effects will appear on the screen, in total this can actually make you commit treason and you will put down bricks more than once (of course, then you get used to it), for example, a pseudo-dog growls from behind the GG, you turn around and there there is no one, or a grenade explodes in front of you or an anomaly appears, not to mention that the screen will shimmer in different colors, the GG will have double vision and in general there will be various negative effects, in general, all this is not too bad. But even this is not the worst thing As one might think, at the very last stage of these hallucinations the camera will behave unpredictably, i.e. she will randomly turn in different directions at some point, and even this is not the end of all the troubles, it will come to the point that the GG will teleport from one location point to another, sometimes it was so that I went to one location for a very long time because I was constantly teleported to the place from where I came.
Below in the view you can check out these same hallucinations.


You can get rid of all these hallucinations by putting all the artifacts out of your backpack and taking an injection that Sakharov gives, but in the end, if you carry artifacts again and cook, it will start again, the only way to get rid of hallucinations forever is to cook the amulet, i.e. When you brew your first amulet, the hallucinations will disappear forever.
In general, the negative state of the GG in the game is done very well, in addition to the hallucinations I described, there are several other interesting features in the game.
Food and water play a significant role in the game, food is not so important, to be honest, I didn’t even understand what the negative effect of hunger is, although I usually didn’t bring the indicator to red, but water in the game is very important if the GG is thirsty stamina drops very much, I’ll say right away that you definitely need to carry several bottles of water with you. If you click this moment, it may turn out that the GG will have difficulty breathing, he will constantly run out of breath, in the end, in order to get at least to some settlement or stalker sites from which you can buy water, you will spend a lot of time because... you will have to wait almost every second for the GG’s stamina to be restored.
There is an alternative option to overcome long distances, the game has transport and sometimes it helps a lot, because very often you will have to run back and forth (I will say right away that its control leaves much to be desired), but the danger is that there are a lot of anomalies on the way, their It’s quite hard to notice, and you have to drive very carefully, otherwise it will all end very quickly.
Naturally, the GG game requires sleep, for this you have a sleeping bag, there’s basically nothing special here, if the hero really wants to sleep, he will also have various effects on the screen, for example, he will become cloudy and see double. But sleep is also needed for example, to wait out the night, since walking around locations at night is not the best idea, even with NVGs it’s quite dark, or for example, you can only take photographs during the day, or some specific time is required to complete a quest, sleep helps a lot in this regard .
But there is one more feature related to sleep, if you often use energy drinks (this is an endurance regenerator if anyone doesn’t know), so if you abuse it, the GG simply will not be able to sleep for quite a long time, i.e. You will also have to walk around the locations at night, so be careful.
Another of the negative features that the game has is a virus that can be picked up in various underground laboratories, negative effects will also consist of various effects on the screen, twitching of the camera while the GG will constantly cough, and the more the virus progresses, the stronger it will become these effects, an indicator of biological infection will appear and it will be green at first, but as the virus progresses, it will turn red, I think that the GG will eventually die, I really have never brought it to this state.
So, in order not to catch the virus, according to the plot you will receive a special spacesuit, without it the first time you simply will not be able to get into the laboratories (in the future you will be able to walk through them without a spacesuit, but you will immediately catch the virus). Moreover, even this spacesuit will not be able to save you if it is seriously damaged. There are a lot of zombies and other evil in the laboratories, I think there is no need to remind that the spacesuit is primarily a protection for various negative effects and not from bullets, accordingly, if you are not very careful until it is quickly turned into a sieve.
According to the plot, you will find a vaccine, and then scientists will further improve it, when you take it you will also need to drink water, but there is an easier way to overcome the virus, this is to take two or three scientific first aid kits.
It would be unforgivable not to mention another interesting feature of the game.
Everyone knows that in the games of the stalker series, swag plays a significant role, it is collected, carried around, sold, it is not only the basis of the stalker’s equipment, his weapons and various auxiliary gadgets, cartridges, ammunition, armor, etc., but this is not yet With poor earnings, you can make good money by selling all this.

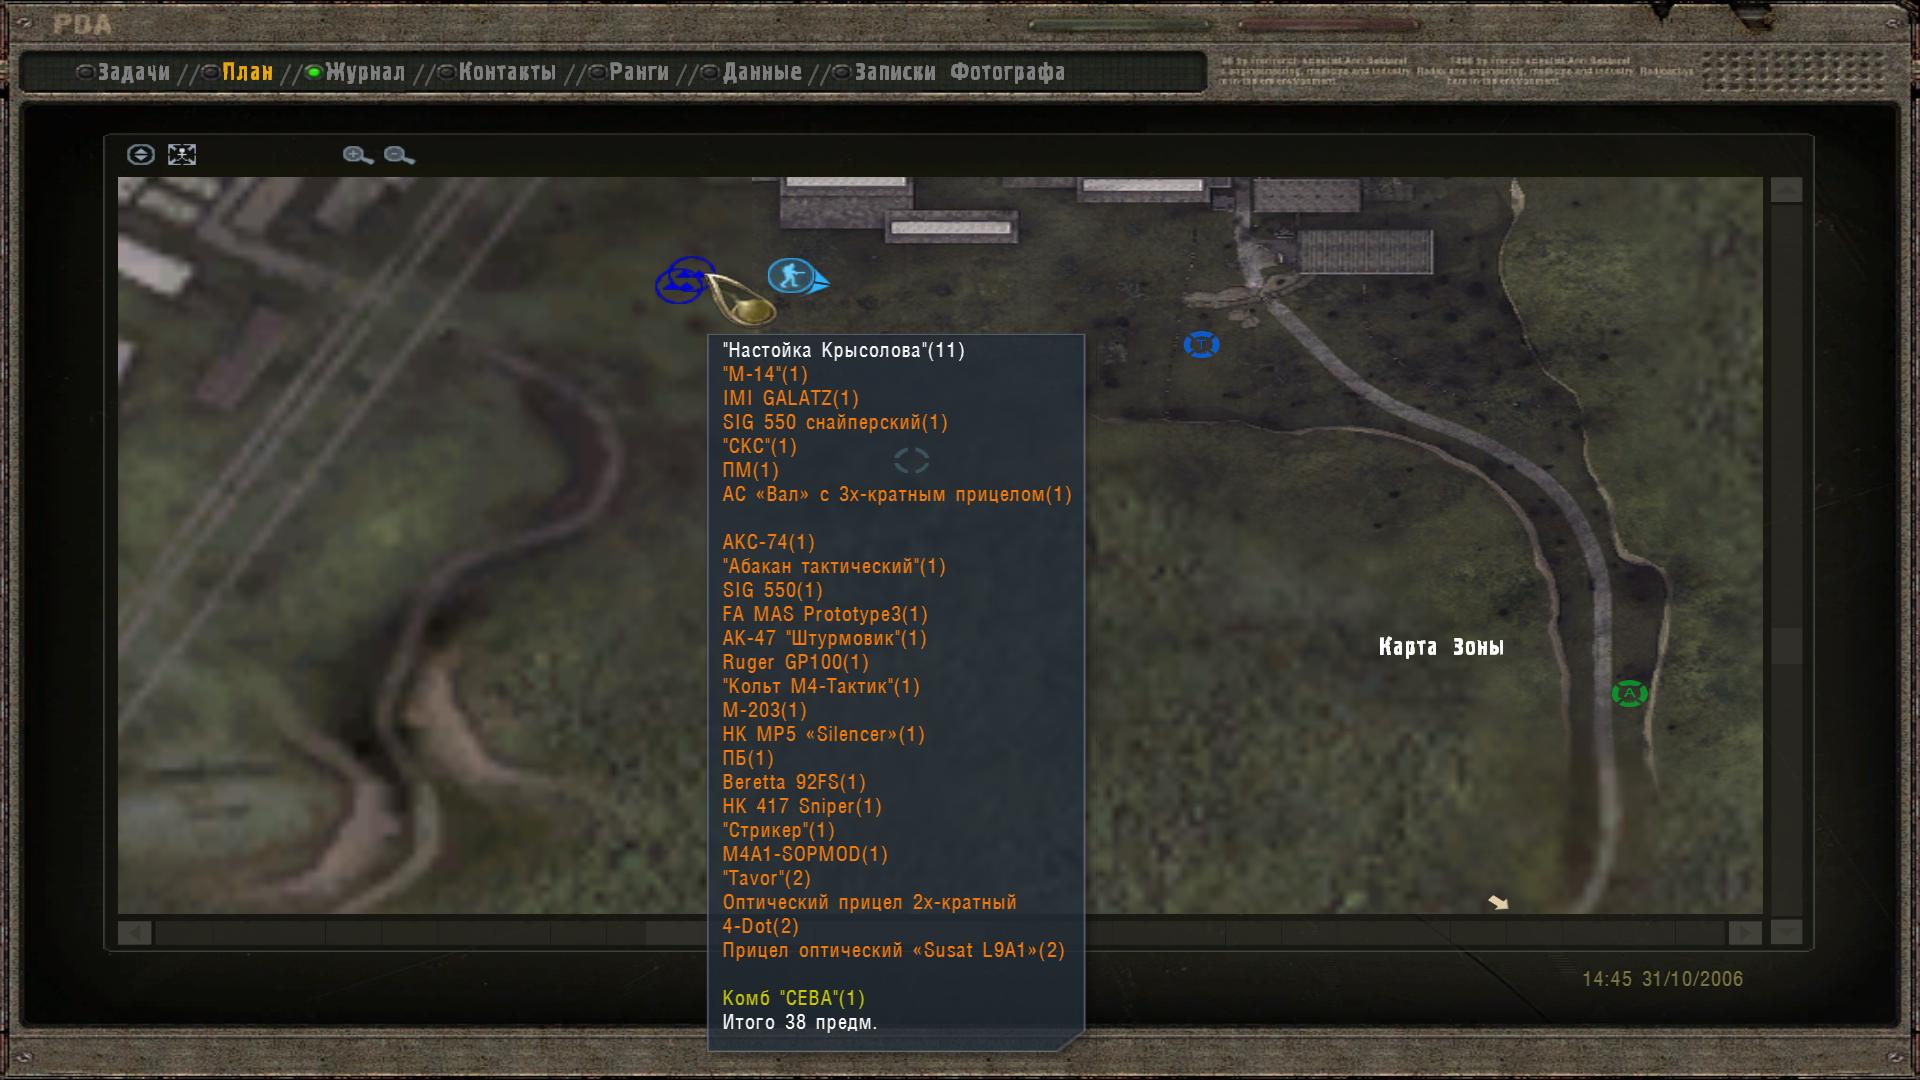
But our GG is still not an elephant and cannot carry all this on himself, so it must be stored somewhere, the game naturally has boxes in certain places, hiding places, and there is even the opportunity to buy backpacks and make caches yourself anywhere, and even putting GPS beacons there so that you can immediately see on the PDA map what is in a particular hiding place, this is very convenient.
So there is one interesting character in the game who will clean out your hiding places.
In the end, everything that was acquired through hard work, well, in general, you understand, and the fatter your stash is, the greater the likelihood that it will be robbed, the principle of not putting all your eggs in one basket works here.
As soon as some cache is cleared, you will receive a message that a cache has been cleared at such and such a location, during the day you can come to this location and, with due observation, find the thief, the only problem is that you will never get your things back, and if If you kill this thief, the situation will only get worse.
Meet Grandfather Zapadlo
This is the comrade who will clean out your hiding places, but let’s go back to killing him, so if you kill him, his granddaughter will appear who will clean out your hiding places with much greater persistence and now you will never be able to find her, choose the lesser of two evils.


All this is really annoying and more than once will be a reason for your butt to burn when you receive another message that the cache with your artifacts that you have been collecting and cooking for so long has been cleared, there is little good, so how to solve this problem, it’s simple.
You will need to complete a certain quest, namely to catch grandfather Zapadlo stealing caches, after two thefts you will need to find him, i.e. you receive a message that a cache in such and such a location has been robbed, you rush headlong to this location and look for the thief, as a result, he has a branch in the dialogue to save his granddaughter, but keep in mind that you can save her only after the story quest in the dead city.
The game also has the opportunity to sell (swag, art, etc. to NPCs), but what is equally important is to exchange, for example, you can exchange a damaged body armor for a new one, of course, an NPC will not exchange a bandit kurta for an army body armor, the exchange should be equal. For some NPCs, mainly merchants, can exchange unique weapons and ammunition for a certain number of different items or mutant parts.
I guess I’ll stop here, anyone who wants to play a really interesting game, I definitely recommend installing this mod; it’s a must-install for fans of the series.
There are a lot of really unique and interesting quests in the game that you will have to puzzle over.
I described the most interesting features of the game, you can see a complete list of all the features below.
Completely new plot, old plot completely cut out.
New quests with several parallel quest lines intertwined with the main storyline.
A parallel research-type quest line has been implemented, aimed at finding and transforming crystals, amulets, absolute minerals and talismans.
A completely new system for issuing secondary quests, the number of which amounts to about 60. There will be six characters in the game who will give out these quests; the quests will be given out as you progress through the story.
The game includes 15 populated locations, which are all involved in the plot and are logically connected to each other.
Transitions between locations will be available to the player immediately after completing story missions.
Newly designed loading screens and game menus.
A system of hallucinations has appeared that will manifest themselves when the main character comes into contact with certain minerals or crystals.
The main character began to feel thirsty, and the actor was susceptible to viral infection.
A huge amount of work has been done to rework the entire sound component of the game, using our own dubbing of characters, various sounds, the main character’s remarks depending on the completion of various quests and around the events taking place, as well as musical content.
There are many Easter eggs in the game, so if you play carefully and leisurely, you can find many interesting gameplay innovations.
The principle of the Photographer mod involves moving the main character to the origins of studying the Zone. Thanks to this, the name of various phenomena, anomalies and mutants will be given by the GG itself. Therefore, in order to find out about the above-listed zone objects in your PDA, you must first conduct research.
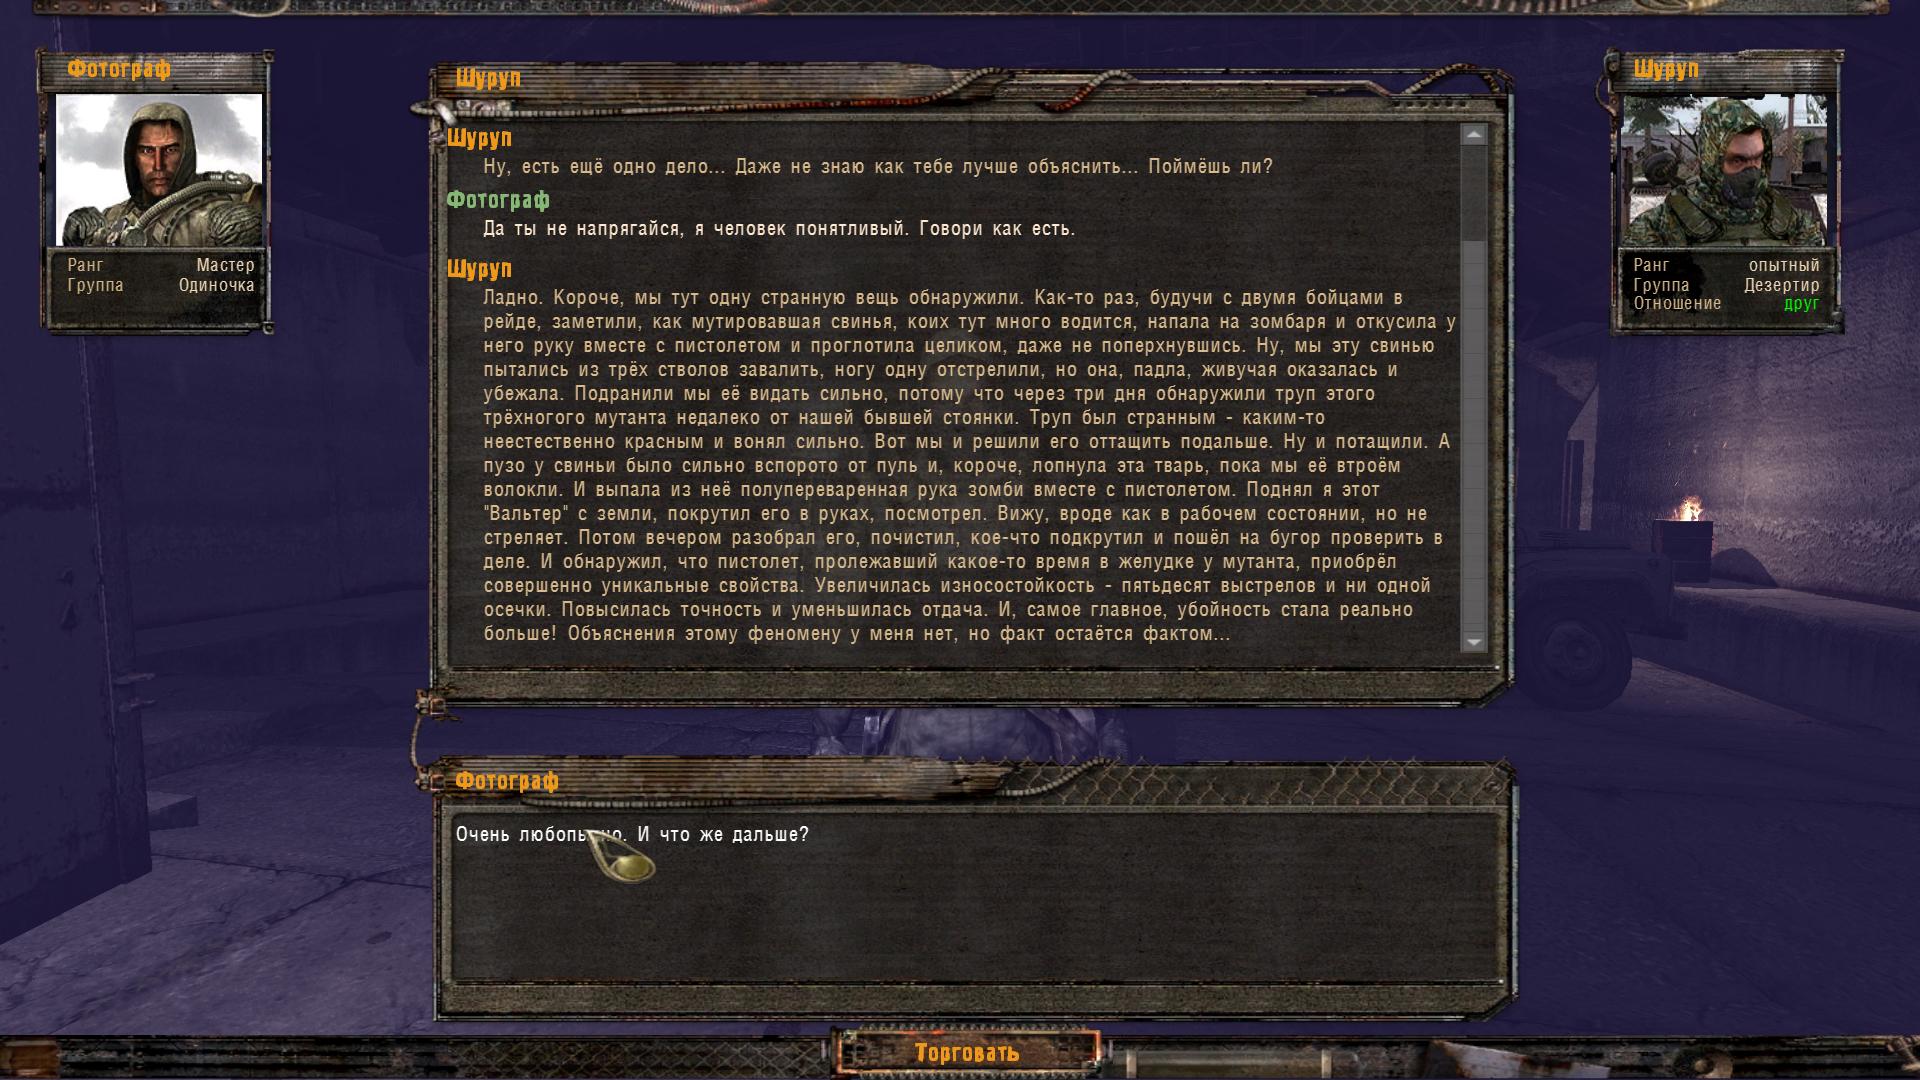
The PDA will have two sections, the first is the Journal - information received from various characters that you will meet as you progress through the plot will be recorded in it. The second section is the Photographer's Notes - information about the Zone found by the main character himself will be collected there.
To maximize the graphics, a texture pack was added to the game.
The game includes such mutants as the Fire Chimera and the Iron Claw, who are quite dangerous opponents.
There will be no artifacts in the game as such, due to the fact that the actions taking place in the plot involve the Exclusion Zone at the time of its inception and initial stage of development. Therefore, instead of artifacts in the game there will be so-called crystals, the properties of which will have to be studied. In this regard, a system for obtaining recipes and anomalous transformations has been introduced into the game. To activate some anomalous zones, a special device will be needed.
You should not expect ready-made recipes; you will have to learn them yourself by comparing and selecting ingredients to obtain the necessary beneficial properties. For receiving recipes, GG will receive serious rewards. All information about successful modifications and the conditions under which this transformation became successful will be recorded in a special section of your PDA.
The game begins in the corridor of a house in the town of the dressing room, here it is called the peacekeeping corps. Everything is clear from the messages that appear. There is a destination point on the mini map.
We talk with the colonel, we need to find the fallen helicopter on which we arrived. The colonel tells who to contact and where to find him. We go and find a stalker named Shaven, we talk, Shaven accompanies us to the fallen helicopter. We examine it, we find our notebook in the looter’s corpse, but there is no camera, the looters stole it. We talk with the shaved man again, he takes us to the merchant Sidorich. We say that Sidor is sending him to the foreman. We go to the foreman, the place is marked on the minimap, we talk, he asks in return to bring the leader’s PDA. Let's go, destroy it, take the PDA, return to the foreman and he says where our camera can be hidden. Let's go and get him. We return to Brown and report to him.
Brown again sends to Sidor. Sidor says that in the bar of the brothers, in the village over the hill, there is a guide who can help with solving our problem. Along the way, in another basement there is a stalker named Drone and asks to find him a leather cloak. The cloak appears randomly, so you will need to inspect all the houses and attics in the village, opposite the bar and on the hill near the bar. We go to a bar, there is a bandit at the entrance and he won’t let you into the bar without a flyer, it’s like a pass. We turn around and leave. Behind the gate of the bar on the right, near the bush, a brother stands and tells you where you can get this flyer pass. We go to the store, there is a merchant in charge there, he looks like a hog, he asks for a pass to bring him 10 antirads. Radar detectors can be obtained at the Ukrainian peacekeepers' base, right here on the mountain where there was a helipad. We will still need a pass to this base in the future.
We bring antirad to the merchant and he gives us a flyer pass. We go to the bar again, show the brother our pass and go downstairs. We try to talk to everyone, and we exchange two bottles of vodka from one of the brothers, who is standing at the table facing the bartender, for photos of naked girls. Now we approach the person who is standing near the bartender’s counter. We have a drink with him and he tells us about the guide Zhorik and says that Zhorik is hungover and needs to bring him beer. We immediately buy beer from the bartender and go to look for the guide Zhorik. Zhorik is sleeping in a booth on a hill to the left of the store. We find him, treat him with beer, and for this he agrees to show us a secret path along which he will lead the mercenaries and the informant. We follow Zhorik, don’t approach him, you can’t let the customers see you, we reach the wooden fence and let him go ahead. We are waiting for the message “to find the secret path” to arrive, which means Zhorik has met with the customers and will now lead them along the secret path.
In general, I walked on the other side of the fence and as soon as I reached the wooden fence, maybe a little further, I stopped and waited for a message. As soon as the message came, I ran to the cliff, where the entrance is a tunnel, and moved to the right towards the fence, again you can’t get close to the fence, they’ll notice. As soon as Zhorik’s mark appeared on the minimap, he stopped and waited, Zhorik’s mark begins to move, which means Zhorik leads them to the border of the location and then leads them along the border of the location to the grid, there is a hole in the grid and Zhorik leads the mercenaries to it. We also begin to move along the cliff to the left, to the tunnel and further to the houses. We stop at the ruins of the first house and don’t go close to the grid. Through binoculars we observe how the group passes through the net and walks along the cliff towards the swamp. We follow them without getting closer. We wait for the message “Destroy the informant” to arrive, we destroy them all, Zhorik is already dead by then, we search them, and we take the PDA from the informant. We go to Dron and give him the cloak, Dron reports that some foreigner wanted to see me. I didn’t talk to this foreigner, the quest is minor. Sidor has a line of dialogue about work.
We go and report to Brown about the completion of the task and give him the informant's PDA. Brown asks to wait. We wait, a message arrives, we go and talk with Brown. He gives us the task of getting to the test site and indicates the place of passage there and back.
After the transition, a message comes that you need to talk with Voronin. First, we go to the points marked on the large map and take pictures. Let's go to Voronin and talk. He explains how to get to the Ukrainian base at the testing site. Sakharov is standing right there in another room, we talk to him, he shows an experiment with crystals and asks us to find his employee Lavrov in the PDA swamps. We agree to find it. We go back to MK and go to the Ukrainian base. There we need to find a cook, the brother of the head of the Ukrainian base on the IP, we already have a pass so the gate is open. We go behind the hangar, where there is a sign for stops, there is a cook standing on a hillock to the side of the fire, that’s what the cook is called. If he’s not there, then we need to look behind the boxes, go to the booth and talk to the authorities, go to the storekeeper and talk too, here’s the cook and will appear in its place. We talk with the cook, take the package and go to the IP. When entering the location, a message comes with a request to help repel the attack of wild boars on the digger village, we make sure to respond to this call and if everything goes well, then a message will come to talk to Edik, this is the eldest in the digger village. After that we go to the Ukrainian base. The cook gave us a pass, so they let us through. We go into the building and on the second floor we find Lieutenant Polishchuk. We talk with him, carefully read the dialogue. He talks about a deserter, which means our task is to find this deserter before the warriors. We find this deserter in the ruins of the ATP, opposite the digger village. We talk to him and make him an offer. After that, we go to Edik in the village and negotiate with him about the deserter. Edik will ask for three army first aid kits as a contribution. First aid kits must be purchased in advance or run to MK and buy from Sidor or somewhere else. We give the first aid kits to Edik, go to the deserter and bring him to the village. We take the document from him.
After this, you can go to the swamp to see Vasiliev. Vasiliev advises talking to the swamp doctor.
Friend Kruglov is standing here. From a conversation with him we learn that he needs to investigate anomalies, we can take this task, or we don’t have to take it. If you took it, you will need to find 7 anomalies: Electra, Snowball, Funnel, Jelly, Frying, Carousel, Springboard.
We find the doctor in his house not far from the destroyed bridge. We talk with him, carefully read the dialogue. We are looking for Lavrov’s body, we come again to the swamp doctor, the doctor gives a note for Sakharov. We go to Sakharov and give him the PDA and the note. Now you can take the task of transforming crystals from Sakharov, or you don’t have to take it.
We go to Brown and report on the completion of the task. Brown says that we should rest and then General Smith will call us. After some time, a message comes from Smith. Let's go to him. We're talking. Smith reports that the photographs did not turn out well and that the camera needs to be upgraded. Smith gives the main task to eliminate two groups of mercenaries and sends us to the industrial zone, the Buildovsky landfill, and the anomalous forest, but there is no transition there, Smith suggests going to Voronin and talking with him about moving to the industrial zone and the anomalous forest, but about upgrading the camera we need talk to scientist Drozdov, he is in the same building as Voronin.
We go to the IP at the base, find Drozdov and ask him to upgrade the camera, Drozdov cannot and sends him to the bar to Lefty. The passage to the bar is also through the industrial zone. We go to Voronin, he also does not know where the crossing is, but he hints at a certain hermit Charon. Let's go look for Charon, if we don't find him right away, then he leaves and doesn't appear again and we won't have a transition to the industrial zone. We go beyond the village of diggers to the fence. There is a passage in the fence, we go into it and immediately go to the left. We will see an openwork tall structure, there is Charon there. We talk with him, he agrees to show the passage, but we need to hand over the parcel to Lukash at the industrial zone. Lukash can also show the passage to the anomalous forest, we agree to take the parcel and receive a passage to the industrial zone.
We go and report to Brown, he gives us a pass to the checkpoint, we go show our pass and they let us through further.
We go to the industrial zone and go look for Lukash. Lukash is standing in a trailer opposite the hangar. He agrees to show the crossing point, but we need to carry out his instructions, we need to take the PDA to the diggers in the hangar. We relate. We report to Lukash, accompany him to the hangar until they clear the territory. Lukash will not talk, we stand below and wait for the deserters to finish clearing, a message arrives, we go talk to Lukash, he marks the crossing point on the map, a red dot appears on the map. We go to this point, at the exit from the hangar a military landing party appears, we help destroy it. We arrive at the marked place, but the crossing is still closed. We must wait for the first group of mercenaries to arrive, we must hide so that they do not discover us, I was hiding on the right behind a hillock, as soon as the mercenary says that they have arrived at the place, a passage into the forest will open, we kill all the mercenaries, search and take away the PDA. We go into the forest, look at the map, there is also a dot there. We go to this point, a message comes. We were hiding so that the mercenaries would not notice us before the time, I hid behind a tree. We wait, and when the mercenaries stop near the crossing and start talking, we destroy them, search them and take away the PDA. Now we need to leave the forest on the IP to Voronin. We look at the map again, there is a red dot on the border of the location, we go to it. We switch to IP and go to the base to the courier, give him the PDA of both mercenaries. We go to Voronin and report on the transitions. Voronin says that Petrenko really asked to come in. We find Petrenko, he asks to bring data from black boxes from ten fallen helicopters, we take on this task. Now you can go to the bar to upgrade your camera. On the MK we find 2 helicopters and take data from the black boxes. We go to the industrial zone, there we find another helicopter and also take data. Let's go to the bar.
Lefty is standing at the entrance. He asks for help in destroying the mutants who have taken over the bar. Let's go and clear the bar of mutants, we need to go forward and clear the area while Lefty and his team catch up. Especially the bunker, and the area where Voronin stood in the original. After clearing, a message comes to talk to Lefty. We go to the bunker and talk. Lefty asks to find the decoder from the dungeon door, we find the decoder in the barn in the far left corner, go free the diggers and talk with Lefty about upgrading the camera. Lefty asks to bring him 2 crystals for work. We bring it, give it away and wait until it’s ready, until we can go look for a helicopter. We go to the bar and talk to the bartender, Uncle Misha, he asks to find some kind of amplifier and says that it can be found at Professor Kaimanov’s IP. We go to the IP through the forest, along the way we find a helicopter and take readings from the black box, go to the base and look for Kaymanov there. Kaimanov is sent to the archives at the Ukrainian base. There we talk with the archive guard, he asks for documents to bring him letters from MG.
Let's go to the bar, Lefty hasn't made a camera yet, we're waiting. A message arrives from Lefty. We talk, take the camera and go to General Smith to report. Smith sends to take several pictures at different locations. A message arrives from Brown's contact. We go into the forest, to the forester’s hut. In the hut we talk with the forester and a little later the messenger comes up. The messenger conveyed a request from Brown to go to the MG and help the German expedition get out of there, and the guide from Sutuly’s group knew the way there. We go to Sutulom and fulfill his request. Slouchy says that the conductor approached the diggers in the bar. We go to the bar to Lefty, he sends us to talk to someone else. Brom is sitting right there, we talk to him, he says that the guide’s name is eagle owl and he is standing in the annex where Petrenko originally stood. The owl asks to bring 2 bottles of wine, we go, find it, and bring it to the owl.
We give it back and he shows the transition to the main stage and explains how to return from there. Before going to the MG, we go into Brom’s bunker. After the conversation we go to the MG.
In MG, as soon as we appear, we immediately go to the right along the fence, behind the fence we see the red tent that Brom spoke about, we find Zuborev in one of the houses on the hills. We talk with him and during the conversation he is killed, this is how it should be. We go to the road, turn back and walk along the fence. We find a passage in the fence, go through and go left to the bridge, cross it and go right along the top of the cliff, find a red tent and pick up an artifact for Brom from the corpse. We return to the bridge and pass further, behind a small swamp, in the lowland, there will be a helicopter from which we need to take readings. Now we go to the square and in the building to the right of the monument we find the main German, Heinrich. Heinrich directs us to the house opposite Jagger. Jagger sends us back to Gertrude. Gertrude demands to find the missing scientist and take his documents. We go to the place where we appeared and again walk along the fence, but in the other direction and in the bushes we find the corpse of a scientist. We take all the papers from him and go to Gertrude. We take the device and go look for a crossing in the eastern part of the city. The transition appears as soon as you approach the desired place. We need to make sure everyone leaves the city. As soon as the last person leaves, the task to bring out the scientists is counted, but it is impossible to approach the transition, it is thrown back. Here you need to remember about Wulf’s note and go look for this physicist, it seems that only he can help in this situation. We begin to have trouble understanding that a physicist can only be in some kind of house, most likely in a five-story building, and there aren’t that many such houses here. We go around all the houses and look at the minimap, as soon as we see a yellow dot, we run there. We find physicist Sergei Andreevich Medvedko. We talk with him and agree to his proposal. We talk with the physicist’s wife, let’s go look for what the physicist asked for. We go back into the hole and go to the southwestern area of the location along the fence, lower left corner on the map. On one of the hills near the house we find a purple ball, take it, it should appear in the backpack, go back and give the physicist this ball. Then we talk with the physicist’s wife and leave the dead city. At the location there is a forest, in a cave among the boulders we find a receiver and go to the bar.
In the bar we give the receiver to Owl, we give the liquidator artifact to Brom. We find a contact. We receive the task of infiltrating X18 and obtaining a communications diagram, but it is not clear how to get there.
We go to the individual entrepreneur at the Ukrainian base, talk to the archive keeper, he advises to talk to the bartender at the bar. Let's go and tell him everything. We leave the bar, hear whispers, go behind the bar, meet the poet, talk to him. Let's go look for the first teleport. The first teleport is not far from the transition to the landfill; you need to go next to the cliff.
After each teleportation, next to the appearance, there is a backpack with a hint to the next teleport; the teleporter remains above the backpack for some time. After several jumps we find ourselves in a dead city, there we need to find a refrigerator, the refrigerator must be looked for in the northern part of the location near the swamp. In X10, in addition to the teleport itself, you also need to find the door code; we carefully examine everything in the area where the teleport appears that it can be written on (code 51273). On the peacekeeping building you need to find a tractor broken into pieces; the remains of the tractor lie near the path in the bushes. In the forest near the found excavator, you need to jump at the right caterpillar on the side of the bucket; sometimes the teleport may not appear immediately. Once in the cave, do not be scared or panic, but calmly move forward, towards the anomalies visible on the mini map.
After completing the entire path, we go to Petrenko and give him the results of scanning the helicopters. Then we go to the Ukrainian base and give the archive guard a note from Greta. We talk with the ensign and leave him a strange object found in the cave, help protect the Ukrainian base, talk with Poleshukov and meet with Colonel Brown. Brown sends him to the secret part of the x18 laboratory. Let's go, you will meet a ghost in the tunnel and ask you to give him a barrel and a pack of cartridges. We give him a fully loaded barrel, preferably our own, and throw in a pack of cartridges; for some reason he didn’t take the cartridges from me. We go further, in the laboratory we find Professor Ploymer, we talk with him, he agrees to cooperate, we accompany him upstairs and report to Brown. After this, we receive a task in the dungeons of the agricultural industry to find a laptop with information and an antiviral drug. Major Shpak from the scientist guard in the swamp knows the way to the agro underground. The major is lying drunk at the top of the tunnel. We talk with him, you can agree to his request, or you can disagree, he will indicate the transition in any case.
We go down into the agro dungeon, shoot all the zombies, but when we try to get to the upper level, we are thrown into the shooter’s hiding place and there a gangster we know speaks to us, he takes away all the ammunition. We are trying to find a way out, after a while a ghost appears, the same one that we met in the tunnel at the Ukrainian base, and now we ask him to give us a gun, the ghost gives us back our gun, which we gave him. We leave the prison and go to the upper level, there we destroy all the brothers and the traitor-scientist. From the corpses we take the laptop and the vaccine against the virus, but there is only one tablet of the vaccine left and it must be brought to Professor Ploymer. There we find our property in the box.
Let's go report to Brown. Brown sends us to scout the passages between the laboratories, we complete this task, find the decoder from the coded door in x18 and find ourselves in the part of the x18 laboratory where we talked with Dr. Ploymer. We go out into the tunnel of the Ukrainian base and go to report to Brown.
Brown asks to find a land route to the collective farm Chervono Dyshlo, and for this you need to talk with Voronin, Voronin sends him to Sakharov and at the same time asks to drive the car from the forest. Sakharov says that we need to go into the forest to the hunters.
We go into the forest, find Slouchy there and ask him to help. He agrees for money and gives him a guide dog. We run after the dog, protect it from monsters, but mercenaries kill it on the path. We kill all the mercenaries and search them, we take the PDA from one of them, a transition to the collective farm appears
After the transition we receive a task from Sakharov. We go to the cemetery, simultaneously destroying little animals, monsters and zombies. In the village near the cemetery we exterminate the brothers. Behind the village we find two hanging islands, we approach them, a dialogue with Sakharov appears and a new task appears. We run to the helicopter and save scientist Ortmont. Let's go with the scientist to the flying islands. Near the islands, after talking with the scientist, you need to have time to neutralize the snipers. We shoot two snipers, they appear from behind, thank God, not at the same time, and talk with Ormont again. After the conversation, a third island appears, the corpse of Academician Ioffe falls from it, sometimes the corpse does not fall out, then we go to the anomaly under the large island and get to the top of this island, on another island we see the corpse of an academician, we jump onto the island and take the flash drive from him, give the flash drive to Ormont . After the conversation, Ormont gives the transition back to the forest. There are two ways here - you can go report to Brown, or again we go to the anomaly under the large flying island, we get into the teleport and we are again thrown to the top of this island. We jump onto a small island and are transported to a nook of one of the farm’s hangars. We eavesdrop on the brothers' conversation about the super exoskeleton and the possibility of finding it, after the end of the conversation we go out and destroy the brothers, an internal monologue should sound that I, supposedly, know where to look. We run to the transition to the forest, find a field for Voronin, drive it to the test site to the gate of the base, report to Voronin, after that we find the Iroquois at the IP and buy the controller’s skin from him, return to MK.
We go to the cave where we originally found our camera, before entering we put on the controller’s skin and go into the cave.
In the room with the stuffed owl, the door behind the stuffed owl is blocked by a seated controller. When approaching him, he must stand up and wave away the GG. There are two people standing near the second door. When approaching them, there is a pause of a few seconds, like a dress code, and then they move apart. This is where the opportunity to open doors arises. We go down. There is a door to a small room where Iron and the main controller sit. There is one at the door and another controller near it, again there is a pause like a dress code, in total there should be 6 controllers and an Iron in the cave. We go inside and approach the Iron. The door closes and locks. Iron mutters information about where he hid the exoskeleton. This means that you will have to somehow go out and find her (if you want to). After listening to Iron, we approach the controller and hear an offer to finish off Iron. We take out a knife and quickly stab the controller, the door opens and you can leave the cave. You can fight and kill all the controllers, this does not affect further events.
Next, we either go to the landfill to look for Iron’s cache, or we go to Brown at the IP and report on the completion of the task of finding a ground crossing in the drawbar.
If you decide to look for the exoskeleton of the Iron, then, as the iron whispered, it is hidden somewhere near the bridge, and the one in the fence under the container standing on the supports is the exoskeleton of the rat catcher, and after finding and taking it, three controllers appear and the GG dies. So you can’t take this copy.
If you decide not to look for Iron’s exoskeleton, then go to Brown. Brown says that there is an agreement with Voronin on the liberation of the collective farm Chervone Drawbar, but first it is necessary to coordinate actions with Voronin. Voronin gives the task to help Plichko seize the factory on the collective farm Chervone Dyshlo. We go again through the forest to the collective farm and there we meet Plichko. We talk with Plichko and run to liberate the factory, we don’t get ahead, otherwise we’ll fail the mission, we help shoot the mercenaries. We wait for Plichko to come, if he is not there, we go to meet him and accompany him to the place. We talk to him again. We are waiting for the release. After the ejection, we talk with Plichko again. Plichko asks to find the escaped leader and take the PDA with information from him. We go to the village, find the leader and take the PDA from him. We are waiting for Voronin to arrive.
We go around all the buildings at the factory and find Voronin, Petrenko is also there, there are green melancholy on the mini map. We give Voronin the PDA of the leader of the mercenaries.
After talking with Voronin, we go look for Brown in the dungeons. We find him half-dead at x10, the ghost of Shubin appears nearby, we talk to him.
Shubin promises to save Brown, but we must help him find a human form, and to do this we need to find 4 pentagrams and activate them by throwing everything that is required at them. To decipher what is written in the pentagrams, Shubin gives a piece of paper from a book, this is nothing more than an alphabet.
We find the pentagrams, activate them and go talk to Shubin. We give him a dead bat and a dead crow, Shubin makes medicine and cures Brown.
We accompany Brown to the Ukrainian base. We follow him up to the second floor and talk to him. He says that Shubin is waiting for us in a cave under the stones in the anomalous forest.
We go into the forest and find Shubin in the cave. He says that it is necessary to free the souls of the dead, 11 souls in total. These are: peacekeeping building - 3 souls, swamps - 1 soul, forest - 1 soul, industrial zone - 3 souls and bar - 3 souls.
On MK we go to the cemetery where the mercenaries killed Zhorik, there we find three crosses with gas masks. When approaching one of them, a sound begins to sound and a spark appears above the cross, here we start blowing Shubin’s pipe, a large sphere should appear and then it will shrink to a small ball and fall to the ground, we blow the pipe until the sphere appears, sometimes you have to blow 2-3 times. We pick up a ball from the ground, insert it into the first slot and shoot it into the sky, watching as the soul flies away. After the soul flies away a sound will be heard. We go to the second cross and repeat the same thing, then we approach the third cross. If no sound appears when approaching the cross, we move further away and then approach the cross again.
We freed three souls and now we are going to the swamp. In the swamp, the cross is located near the fence opposite the house, where there is a transition to the agricultural industry underground. We carry out all the actions to free the soul. Now we go to the anomalous forest. In the forest, the cross is located behind the trailer where Stulyy stands, a little to the south, under a large tree. We free our souls and go to the industrial zone.
In the industrial zone there are 1 crosses. Near the Tunnel, Houses and 2 large Towers. From the House into the passage between the towers across the Road near the cliff. 2. From the transition to MK, look for the Furu, behind it near the cliff. 3. When you go to the passage to the bar, you will pass the trailers (where Lukash was) and go right to the cliff, you won’t miss.
We freed all 3 souls and now we go to the bar.
In the bar there are crosses - 1. on the left, as you cross the ditch with stakes, by the fence. 2. immediately after the containers on the right of the road in front of the southern checkpoint. 3. as you go towards the transition to the MG on the left behind the building behind the Christmas tree.
After that, we go to Shubin in the cave under the stones and report to the front. Shubin, as a reward, says that he himself does not know where the passage to the secret cave is, but the former nuclear power plant engineer Pashka, who is hiding in various basements of destroyed buildings in Pripyat, knows.
We go to the forester, he asks to bring 2 bottles of tincture, we remember that the tincture is made by the rat catcher, after that we go to the MK and go to the rat catcher. An SMS arrives from Smith, we follow the instructions in the SMS. Smith says who should have information about the transition to Pripyat. We go to the indicated place, find Razuvaev, take the PDA from him, a passage to Pripyat appears.
After receiving the transition, we go there, you need to have 1 can of condensed milk with you to talk with Pashka (the rest will then need to be found in a cache in Pripyat). First, we find a cache with door codes in a secret cave and condensed milk for Pashka. The cache can appear in one of four places:
1. At the stadium - the northern stand, between the left benches.
2. Eastern part of the stadium, on the ground near the fence.
3. A grocery store near the bus station in the nook where the mailboxes are.
4. Near the entrance to the basement in the grocery store near the bus station..
We find the cache and take the PDA with codes and condensed milk for Pashka.
Let's go look for Pashka, find him in the basement of the club, give him the condensed milk and get passage to a secret cave.
After the transition, we find ourselves on the upper level, in Solyanka it is a labyrinth, we go to the second level, where the coded door is located. We open this door using the code found in the cache in Pripyat. We take the ammunition in the box and go to the next level. At the first level, use the code to open the first door of the bunker and move on, go higher, open the second door, go higher again, in the last room we find a box with a map, take it and then a message appears about going to the sarcophagus. We open the third door and go outside, Charon is waiting for us there, he speaks to us and disappears. We look at the map and go to the lower level into the labyrinth. We first find the teleport, it transfers to another level of the labyrinth, and then the transition to the sarcophagus. Everything in the sarcophagus is like the original.
Psi zones for crystal transformation:
There are crystals in almost any location. They appear after Sakharov’s task to search for Professor Lazarev in the swamp and subsequent submission of the task to Sakharov and taking from him the task of transforming the crystals. At the same time, a description of the transformations appears in the log.
The backpack must have a full set of 24 crystals, then when it enters the psi zone, it begins to respond with sound to the necessary crystals, so to speak, to sing. After that, you start throwing them out in pairs, for example 1 and 13, 2 and 14, etc. until the transformation occurs. Then you repeat all this in another psi zone that reacts with sound to the remaining crystals.
When all the crystals are in the backpack, the similarity of the pairs will be noticeable, for example, 1 and 13 are of the same shape, and so are the other pairs.
To transform you need crystals:
In zone No. 1 10-22,
in zone No. 2 07-19,
in zone No. 3 04-16,
in zone No. 4 03-15
If you took the task from Max, in the hangar at the dump, to search for a backpack in the basements, then you won’t just get there, all obvious passages are closed. We go around the hangar from the street along the perimeter; there are holes in the asphalt with bars. We look for one without bars and jump into it, they say that there is still one somewhere in the bushes.
We find a backpack. After taking the backpack, you need to go into the passage that comes in waves, wait until you are thrown out - a curtain appears, remember, we go to the gap, also try to exit - it throws you out and a curtain appears, remember, we go to the double exit and go through the left one, which leads onto the street - he throws it out and a curtain appears, remember, we go to the passage that leads to Screw in the hangar, the same actions, a curtain appears and then we go into the passage with the stairs and go out into the courtyard of the Hangar. All!)
Walkthrough of the main storyline:
We speak with General Smith, take our things in the box.
We talk to the razor and go to the fallen helicopter.
We search the bandit's corpse and take away the documents. Let's go to the village.
We speak with Sidorovich and go to the stalkers.
We find the Brigadier in the house and talk to him. After the conversation, we go to the stalkers and go to the rocks.
We kill all the bandits and take the PDA with the coordinates of the cache from one.
We take the things in the stuffed animal’s “ass” and return to the Brigadier. We give him the PDA and go to the base.
We speak with Colonel Brown and go to the Brothers in the Bar. But we are not allowed there.
We speak with Vityukha Prince near the entrance to the bar. And we go to the Store.
We speak with Borey Serov and go to the military base. But we are not allowed there. We talk to Brown and take cognac from him and go to the base of the Ukrainians.
We talk to Good Man near the entrance and go to the Leader. We watch the scene and talk to the Storekeeper. He asked to bring food in exchange for the antirads.
You can get condensed milk from Zhorik Buben, who has a birthday. We give him the muffler and our condensed milk. Mushrooms can be bought from Sidorovich. We give the antirads to the merchant and receive a flyer for entry.
We speak with Zhila and receive information about the mercenaries. Let's go to Zhorik.
We talk with Zhorik about the mercenaries and go with him. We track where they are moving and kill the Neemniks. We take the documents and PDA and give it to Colonel Brown. We are moving to the Polygon.
At the Test Site we take photographs of the object and talk with General Voronin.
We speak with Sakharov and go to the Swamps.
We speak with Vasiliev and go to the Doctor.
We find out from the Doctor where the scientist could have disappeared and go to the farm.
On Khutor, near the helicopter, we find the corpse of a scientist. We stuff the documents and the armored suit.
We speak with Kruglov and carry out his tasks. After this we return to the Polygon.
We speak with Sakharov, give the documents and the note. You can take on tasks to find crystals.
At the Peacekeeping Corps we speak with the Cook and receive an access card to the Ukrainian base at the Test Site.
In the village we help Edik’s fighters fight off the wild boars and talk to him.
At the Ukrainian base we speak with Lieutenant Polishchuk and go look for the deserter. Don't go underground!
We talk with Mukhamedov and help him get to the village. We fill in the diagram and go to the Peacekeeping Corps. We speak with Brown and Smith. We go to the Polygon to Voronin.
Industrial zone:
We go to the industrial zone and go look for Lukash. Lukash is standing in a trailer opposite the hangar. He agrees to show the crossing point, but we need to carry out his instructions, we need to take the PDA to the diggers in the hangar. We relate. We report to Lukash, accompany him to the hangar until they clear the territory. Lukash will not talk, we stand below and wait for the deserters to finish clearing, a message arrives, we go talk to Lukash, he marks the crossing point on the map, a red dot appears on the map. We go to this point, at the exit from the hangar a military landing party appears, we help destroy it. We arrive at the marked place, but the crossing is still closed. We must wait for the first group of mercenaries to arrive, we must hide so that they do not discover us, I was hiding on the right behind a hillock, as soon as the mercenary says that they have arrived at the place, a passage into the forest will open, we kill all the mercenaries, search and take away the PDA. We go into the forest, look at the map, there is also a dot there. We go to this point, a message comes. We were hiding so that the mercenaries would not notice us before the time, I hid behind a tree. We wait, and when the mercenaries stop near the crossing and start talking, we destroy them, search them and take away the PDA. Now we need to leave the forest on the IP to Voronin. We look at the map again, there is a red dot on the border of the location, we go to it. We switch to IP and go to the base to the courier, give him the PDA of both mercenaries. We go to Voronin and report on the transitions. Voronin says that Petrenko really asked to come in. We find Petrenko, he asks to bring data from black boxes from ten fallen helicopters, we take on this task. Now you can go to the bar to upgrade your camera. On the MK we find 2 helicopters and take data from the black boxes. We go to the industrial zone, there we find another helicopter and also take data. Let's go to the bar.
Bar:
Lefty is standing at the entrance. He asks for help in destroying the mutants who have taken over the bar. Let's go and clear the bar of mutants, we need to go forward and clear the area while Lefty and his team catch up. Especially the bunker, and the area where Voronin stood in the original. After clearing, a message comes to talk to Lefty. We go to the bunker and talk. Lefty asks to find the decoder from the dungeon door, we find the decoder in the barn in the far left corner, go free the diggers and talk with Lefty about upgrading the camera. Lefty asks to bring him 2 crystals for work. We bring it, give it away and wait until it’s ready, until we can go look for a helicopter. We go to the bar and talk to the bartender, Uncle Misha, he asks to find some kind of amplifier and says that it can be found at Professor Kaimanov’s IP. We go to the IP through the forest, along the way we find a helicopter and take readings from the black box, go to the base and look for Kaymanov there. Kaimanov is sent to the archives at the Ukrainian base. There we talk with the archive guard, he asks for documents to bring him letters from MG.
Let's go to the bar, Lefty hasn't made a camera yet, we're waiting. A message arrives from Lefty. We talk, take the camera and go to General Smith to report. Smith sends to take several pictures at different locations. A message arrives from Brown's contact. We go into the forest, to the forester’s hut. In the hut we talk with the forester and a little later the messenger comes up. The messenger conveyed a request from Brown to go to the MG and help the German expedition get out of there, and the guide from Sutuly’s group knew the way there. We go to Sutulom and fulfill his request. Slouchy says that the conductor approached the diggers in the bar. We go to Lefty’s bar, he sends us to talk to someone else. Brom is sitting right there, we talk to him, he says that the guide’s name is eagle owl and he is standing in the annex where Petrenko originally stood. The owl asks to bring 2 bottles of wine, we go, find it, and bring it to the owl.
We give it back and he shows the transition to the main stage and explains how to return from there. Before going to the MG, we go into Brom’s bunker. After the conversation we go to the MG.
Dead City (MG):
In MG, as soon as we appear, we immediately go to the right along the fence, behind the fence we see the red tent that Brom spoke about, we find Zuborev in one of the houses on the hills. We talk with him and during the conversation he is killed, this is how it should be. We go to the road, turn back and walk along the fence. We find a passage in the fence, go through and go left to the bridge, cross it and go right along the top of the cliff, find a red tent and pick up an artifact for Brom from the corpse. We return to the bridge and pass further, behind a small swamp, in the lowland, there will be a helicopter from which we need to take readings. Now we go to the square and in the building to the right of the monument we find the main German, Heinrich. Heinrich directs us to the house opposite Jagger. Jagger sends us back to Gertrude. Gertrude demands to find the missing scientist and take his documents. We go to the place where we appeared and again walk along the fence, but in the other direction and in the bushes we find the corpse of a scientist. We take all the papers from him and go to Gertrude. We take the device and go look for a crossing in the eastern part of the city. The transition appears as soon as you approach the desired place. We need to make sure everyone leaves the city. As soon as the last person leaves, the task to bring out the scientists is counted, but it is impossible to approach the transition, it is thrown back. Here you need to remember about Wulf’s note and go look for this physicist, it seems that only he can help in this situation. We begin to have trouble understanding that a physicist can only be in some kind of house, most likely in a five-story building, and there aren’t that many such houses here. We go around all the houses and look at the minimap, as soon as we see a yellow dot, we run there. We find physicist Sergei Andreevich Medvedko. We talk with him and agree to his proposal. We talk with the physicist’s wife, let’s go look for what the physicist asked for. We go back into the hole and go to the southwestern area of the location along the fence, lower left corner on the map. On one of the hills near the house we find a purple ball, take it, it should appear in the backpack, go back and give the physicist this ball. Then we talk with the physicist’s wife and leave the dead city. At the location there is a forest, in a cave among the boulders we find a receiver and go to the bar.
Bar:
In the bar we give the receiver to Owl, we give the liquidator artifact to Brom. We find a contact. We receive the task of infiltrating X18 and obtaining a communications diagram, but it is not clear how to get there.
We go to the individual entrepreneur at the Ukrainian base, talk to the archive keeper, he advises to talk to the bartender at the bar. Let's go and tell him everything. We leave the bar, hear whispers, go behind the bar, meet the poet, talk to him. Let's go look for the first teleport. The first teleport is not far from the transition to the landfill; you need to go next to the cliff.
Secret path:
After each teleportation, next to the appearance, there is a backpack with a hint to the next teleport; the teleporter remains above the backpack for some time. After several jumps we find ourselves in a dead city, there we need to find a refrigerator, the refrigerator must be looked for in the northern part of the location near the swamp. In X10, in addition to the teleport itself, you also need to find the door code; we carefully examine everything in the area where the teleport appears that it can be written on (code 51273). On the peacekeeping building you need to find a tractor broken into pieces; the remains of the tractor lie near the path in the bushes. In the forest near the found excavator, you need to jump at the right caterpillar on the side of the bucket; sometimes the teleport may not appear immediately. Once in the cave, do not be scared or panic, but calmly move forward, towards the anomalies visible on the mini map.
Test site:
After completing the entire path, we go to Petrenko and give him the results of scanning the helicopters. Then we go to the Ukrainian base and give the archive guard a note from Greta. We talk with the ensign and leave him a strange object found in the cave, help protect the Ukrainian base, talk with Poleshukov and meet with Colonel Brown. Brown sends him to the secret part of the x18 laboratory. Let's go, you will meet a ghost in the tunnel and ask you to give him a barrel and a pack of cartridges. We give him a fully loaded barrel, preferably our own, and throw in a pack of cartridges; for some reason he didn’t take the cartridges from me. We go further, in the laboratory we find Professor Ploymer, we talk with him, he agrees to cooperate, we accompany him upstairs and report to Brown. After this, we receive a task in the dungeons of the agricultural industry to find a laptop with information and an antiviral drug. Major Shpak from the scientist guard in the swamp knows the way to the agro underground. The major is lying drunk at the top of the tunnel. We talk with him, you can agree to his request, or you can disagree, he will indicate the transition in any case.
Dungeons:
We go down into the agro dungeon, shoot all the zombies, but when we try to get to the upper level, we are thrown into the shooter’s hiding place and there a gangster we know speaks to us, he takes away all the ammunition. We are trying to find a way out, after a while a ghost appears, the same one that we met in the tunnel at the Ukrainian base, and now we ask him to give us a gun, the ghost gives us back our gun, which we gave him. We leave the prison and go to the upper level, there we destroy all the brothers and the traitor-scientist. From the corpses we take the laptop and the vaccine against the virus, but there is only one tablet of the vaccine left and it must be brought to Professor Ploymer. There we find our property in the box.
Let's go report to Brown. Brown sends us to scout the passages between the laboratories, we complete this task, find the decoder from the coded door in x18 and find ourselves in the part of the x18 laboratory where we talked with Dr. Ploymer. We go out into the tunnel of the Ukrainian base and go to report to Brown.
Brown asks to find a land route to the collective farm Chervono Dyshlo, and for this you need to talk with Voronin, Voronin sends him to Sakharov and at the same time asks to drive the car from the forest. Sakharov says that we need to go into the forest to the hunters.
Anomalous forest:
We go into the forest, find Slouchy there and ask him to help. He agrees for money and gives him a guide dog. We run after the dog, protect it from monsters, but mercenaries kill it on the path. We kill all the mercenaries and search them, we take the PDA from one of them, a transition to the collective farm appears
Collective farm Chervone drawbar:
After the transition we receive a task from Sakharov. We go to the cemetery, simultaneously destroying little animals, monsters and zombies. In the village near the cemetery we exterminate the brothers. Behind the village we find a hanging island, approach it, a dialogue with Sakharov appears and a new task appears. We run to the helicopter and save scientist Ortmont. Let's go with the scientist to the flying island. Near the island, after talking with the scientist, you need to have time to neutralize the snipers. We shoot two snipers, they appear, thank God, not at the same time, and talk with Ormont again. Then we go to the anomaly under the flying island, find the corpse of Academician Ioffe, take the flash drive from him and take it to Ormont. After the conversation, Ormont gives the transition back to the forest. We go into the forest, find a field for Voronin, drive it to the test site at the base gate, report to Voronin, then go to Brown and report on the completion of the task. Brown says that there is an agreement with Voronin on the liberation of the collective farm Chervone drawbar, but first it is necessary to coordinate actions with Voronin. Voronin gives the task to help Plichko seize the factory on the collective farm Chervone Dyshlo. We go again through the forest to the collective farm and there we meet Plichko. We talk with Plichko and run to liberate the factory, we don’t get ahead, otherwise we’ll fail the mission, we help shoot the mercenaries. We wait for Plichko to come, if he is not there, we go to meet him and accompany him to the place. We talk to him again. We are waiting for the release. After the ejection, we talk with Plichko again. Plichko asks to find the escaped leader and take the PDA with information from him. We go to the village, find the leader and take the PDA from him. We are waiting for Voronin to arrive.
We go around all the buildings at the factory and find Voronin, Petrenko is also there, there are green melancholy on the mini map. We give Voronin the PDA of the leader of the mercenaries.
Dungeons:
After talking with Voronin, we go look for Brown in the dungeons. We find him half-dead at x10, the ghost of Shubin appears nearby, we talk to him.
Shubin promises to save Brown, but we must help him find a human form, and to do this we need to find 4 pentagrams and activate them by throwing everything that is required at them. To decipher what is written in the pentagrams, Shubin gives a piece of paper from a book, this is nothing more than an alphabet.
We find the pentagrams, activate them and go talk to Shubin. We give him a dead bat and a dead crow, Shubin makes medicine and cures Brown.
We accompany Brown to the Ukrainian base. We follow him up to the second floor and talk to him. He says that Shubin is waiting for us in a cave under the stones in the anomalous forest.
Shubin:
We go into the forest and find Shubin in the cave. He says that it is necessary to free the souls of the dead, 11 souls in total. These are: peacekeeping building - 3 souls, swamps - 1 soul, forest - 1 soul, industrial zone - 3 souls and bar - 3 souls.
On MK we go to the cemetery where the mercenaries killed Zhorik, there we find three crosses with gas masks. When approaching one of them, a sound begins to sound and a spark appears above the cross, here we start blowing Shubin’s pipe, a large sphere should appear and then it will shrink to a small ball and fall to the ground, we blow the pipe until the sphere appears, sometimes you have to blow 2-3 times. We pick up a ball from the ground, insert it into the first slot and shoot it into the sky, watching as the soul flies away. After the soul flies away a sound will be heard. We go to the second cross and repeat the same thing, then we approach the third cross. If no sound appears when approaching the cross, we move further away and then approach the cross again.
We freed three souls and now we are going to the swamp. In the swamp, the cross is located near the fence opposite the house, where there is a transition to the agricultural industry underground. We carry out all the actions to free the soul. Now we go to the anomalous forest. In the forest, the cross is located behind the trailer where Stulyy stands, a little to the south, under a large tree. We free our souls and go to the industrial zone.
In the industrial zone there are 1 crosses. Near the Tunnel, Houses and 2 large Towers. From the House into the passage between the towers across the Road near the cliff. 2. From the transition to MK, look for the Furu, behind it near the cliff. 3. When you go to the passage to the bar, you will pass the trailers (where Lukash was) and go right to the cliff, you won’t miss.
We freed all 3 souls and now we go to the bar.
In the bar there are crosses - 1. on the left, as you cross the ditch with stakes, by the fence. 2. immediately after the containers on the right of the road in front of the southern checkpoint. 3. as you go towards the transition to the MG on the left behind the building behind the Christmas tree.
After that, we go to Shubin in the cave under the stones and report to the front. Shubin, as a reward, says that he himself does not know where the passage to the secret cave is, but the former nuclear power plant engineer Pashka, who is hiding in various basements of destroyed buildings in Pripyat, knows.
We go to the forester, he asks to bring 2 bottles of tincture, we remember that the tincture is made by the rat catcher, after that we go to the MK and go to the rat catcher. An SMS arrives from Smith, we follow the instructions in the SMS. Smith says who should have information about the transition to Pripyat. We go to the indicated place, find Razuvaev, take the PDA from him, a passage to Pripyat appears.
Pripyat:
After receiving the transition, we go there, you need to have 1 can of condensed milk with you to talk with Pashka (the rest will then need to be found in a cache in Pripyat). First, we find a cache with door codes in a secret cave and condensed milk for Pashka. The cache can appear in one of four places:
1. At the stadium - the northern stand, between the left benches.
2. Eastern part of the stadium, on the ground near the fence.
3. On the third floor of the house in the northeast in the nook where the mailboxes are
4. Near the entrance to the basement of the house in the northwest.
We find the cache and take the PDA with codes and condensed milk for Pashka.
Let's go look for Pashka, find him in the basement of the club, give him the condensed milk and get passage to a secret cave.
Cave:
After the transition, we find ourselves on the upper level, in Solyanka it is a labyrinth, we go to the second level, where the coded door is located. We open this door using the code found in the cache in Pripyat. We take the ammunition in the box and go to the next level. At the first level, use the code to open the first door of the bunker and move on, go higher, open the second door, go higher again, in the last room we find a box with a map, take it and then a message appears about going to the sarcophagus. We open the third door and go outside, Charon is waiting for us there, he speaks to us and disappears. We look at the map and go to the lower level into the labyrinth. We first find the teleport, it transfers to another level of the labyrinth, and then the transition to the sarcophagus. Everything in the sarcophagus is like the original.
Completing the new quest with the skin of the controller:
We eavesdrop on the market of merchants in Dyshla. If you listened to the end (there are 4 phrases), then only in this case will the Iroquois spawn on the IP and all the brothers in the MK. The task as such is not given, but the point is that it would be nice to find this Iron and possibly save him and get an ex. We go to Iroquois, buy a skin (there will be a purchase option at a discount if you previously bought a white suit for the subway) and then go to MK. In the room with the stuffed owl, the door behind the stuffed one is blocked by a sitting counter. When approaching him, he must stand up and wave away the GG. There are two people standing near the second door. When approaching them, there is a pause of a few seconds, like a dress code, and then they move apart. This is where the opportunity to open doors arises. We go down. There is a door to a small room where Iron and the main counterman sit. There is one at the door and another counter near it. In total, there should be 6 controls and an Iron in the cave. We go inside and approach the Iron. The door closes and locks. The iron mutters information about where the exu is stuck. This means that you will have to somehow go out and find her (if the player has the desire). At this point, forks in events are possible. After listening to Iron, we approach the counter and hear an offer to finish off Iron. Dilemma. How to get weapons? If you get it, the counters become enemies. If you don’t get it and wait, then the counter asks why GG is delaying? Here, in any case, you will have to fight with them. Either by taking out the weapon, we puncture, or after a pause, if the barrel is not shined, the counter will recognize the enemy in the face of the GG and the war is guaranteed. In all cases, there are two ways to get out of the cave (the door will open): kill the main counter with a knife in time or take the key from him (as you called it). Use the key correctly. Show a little ingenuity.